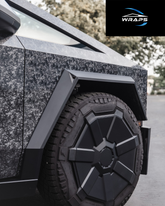
The Tesla Cybertruck is known for its futuristic design and robust performance, but why not make it truly your own? DIY wraps offer an exciting opportunity to customize your Cybertruck’s appearance without the need for professional services. In this article, we’ll guide you through the process of wrapping your Cybertruck at home, covering everything from materials to step-by-step instructions.
Why Choose DIY Wraps?
1. Cost Savings: One of the primary reasons to opt for a DIY wrap is cost. Professional wrapping services can be expensive, but doing it yourself allows you to achieve a personalized look at a fraction of the price.
2. Customization: DIY wraps give you complete control over the design. Whether you prefer a sleek matte finish, a bold color, or a custom graphic, you can tailor the wrap to your exact preferences.
3. Satisfaction: There’s a sense of accomplishment that comes with completing a project yourself. Wrapping your Cybertruck can be a rewarding experience and a chance to showcase your creativity and skills.
Materials Needed
Before you start, gather the necessary materials:
- High-quality vinyl wrap
- Heat gun or hair dryer
- Squeegee or credit card wrapped in a soft cloth
- Utility knife or precision cutting tool
- Measuring tape
- Cleaning supplies (soap, water, and isopropyl alcohol)
- Masking tape
Step-by-Step Guide
1. Preparation:
- Clean the Surface: Thoroughly wash your Cybertruck to remove dirt, dust, and any contaminants. Use soap and water, followed by isopropyl alcohol to ensure a clean surface.
- Remove Obstructions: Take off any removable parts such as badges, trim, and lights to create a smooth surface for wrapping.
2. Measure and Cut:
- Measure Sections: Measure the dimensions of each section of your Cybertruck that you plan to wrap. Add a few extra inches to each measurement to account for errors and trimming.
- Cut the Vinyl: Cut the vinyl wrap into manageable pieces based on your measurements.
3. Apply the Wrap:
- Position the Vinyl: Peel off a small section of the backing and position the vinyl on the surface. Use masking tape to hold it in place if necessary.
- Smooth the Vinyl: Use a squeegee or credit card wrapped in a soft cloth to smooth out the vinyl, starting from the center and working outward. Apply heat with a heat gun or hair dryer to help the vinyl conform to curves and edges.
4. Trim and Finish:
- Trim Excess Vinyl: Use a utility knife or precision cutting tool to trim excess vinyl from edges and around details. Be careful not to cut into the vehicle’s surface.
- Finalize the Wrap: Continue to smooth out any bubbles or wrinkles using the squeegee and heat. Reattach any removed parts once the wrap is complete.
Tips for Success
- Take Your Time: Rushing the process can lead to mistakes. Take your time to ensure each step is done correctly.
- Work in a Clean Environment: Dust and debris can get trapped under the vinyl, so work in a clean, indoor space if possible.
- Practice on Small Sections: If you’re new to wrapping, start with smaller sections or practice on a different vehicle to build your skills.
Wrapping your Cybertruck yourself is a feasible and rewarding project that allows for total customization and cost savings. By following this guide and taking your time, you can achieve a professional-looking wrap that transforms your vehicle. So, gather your materials, clear your workspace, and get ready to give your Cybertruck a unique and personal touch with a DIY wrap!


